If you’re a newbie to yoga, it’s perfectly normal to feel intimidated by the die-hard yogis who are warming up for handstand class. You may feel overwhelmed as a starting yoga student by the sheer number of poses and their odd-sounding names. But remember, everybody has to start somewhere. You can take on more challenging poses as you progress, but keeping things simple when you’re just starting is a good idea. The basic yoga poses for beginners outlined here are valuable enough for a long time to keep you occupied.
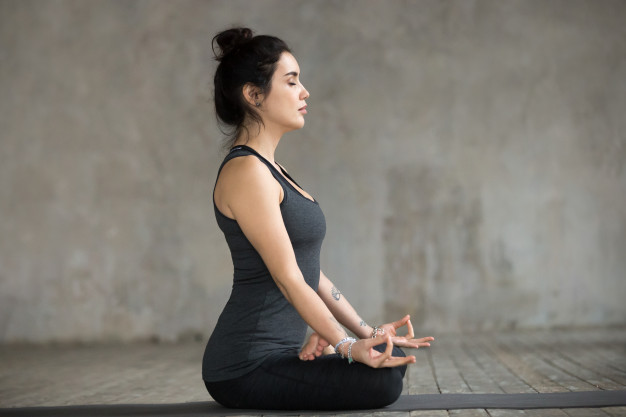
1. Sukhasana/ Easy Pose
Sukhasana, an easy pose, is a simple cross-legged sitting asana in hatha yoga, sometimes used for meditation in both Buddhism and Hinduism.
Step-By-Step Instructions For Easy Pose
- Begin to sit at Dandasana
- In front of the left, cross the right shin so that the knees stack over the feet,
- Be directly on top of the sitting bones, so that the pelvis bowl is upright, spilling neither forward nor backward.
- Clamp the knees with your hands and pull the length of the spine forward and up with your arms.
- Draw the sacrum towards the navel and the spine of the thorax towards the sternum
- Press the sitting bones firmly to extend the spine further, lifting and opening the chest.
- Note if the front ribs have flared and softened them instead.
- Maintain a gentle and stable gaze
- Hold for anywhere from 10 to several minutes, then change the leg cross and repeat on the other side.
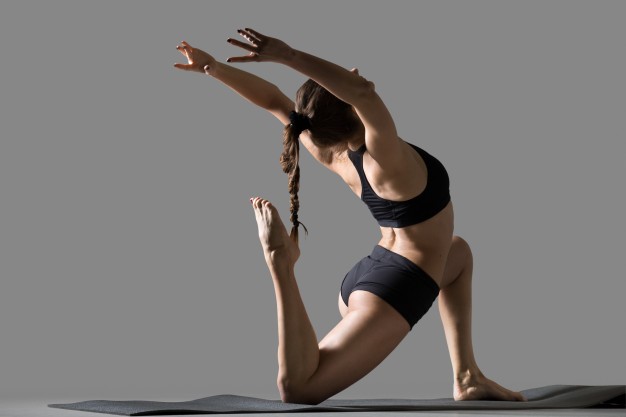
2. Ardha Matsyendrasana/ Half Lord of The Fishes Pose
Twists are an important component of yoga. It is one of the famous yoga poses for beginners. They increase spinal mobility and can also move things through the digestive tract (yes, twists can help with constipation). In this position, it’s okay to stretch your bottom leg if it’s painful to have it bent behind you

Step-By-Step Instructions For Half Lord of The Fishes Pose
- Start by sitting with the legs in Gomukhasana (Cow Face Pose), right knee on top.
- Root down to rebound up the length of your spine with your sitting bones.
- Imagine a central axis extending from your pelvic floor to your head’s crown across your torso.
- Emphasize both the length and the dignity of this axis with each inhalation; the column is straight and does not tilt or curve off to one side.
- Place your right foot on the outside of your left knee, holding your left leg in its current position.
- Root down while simultaneously descending your right outer hip with your right big toe mound.
- Inhale, and to the ceiling, take your left arm.
- Exhale, and hook your left elbow to your right knee. Outside of your right hip, take your right hand to the floor.
- Note how you prefer to buckle your right knee into your midline; instead, press it to the right to build more resistance to operate against the left elbow.
- To the other side, repeat.
3. Ananda Balasana/ Happy Baby

A happy baby is a great way to finish a session of yoga. The significant interplay between effort and ease in yoga is also a good example
Happy Baby Pose: Instructions Step-by-Step
- Lie on the back of you, Bending your knees into your stomach with an exhale
- Inhale, grip your hands on the outside of your feet (if you have difficulty holding the feet directly with your hands, hold onto a belt looped over each sole.) Slightly wider than your torso, open your knees, then bring them up towards your armpits.
- Directly place each ankle over the knee, so your shins are perpendicular to the floor. Through the heels, flex. When you pull your hands down to create resistance, gently push your feet up into your hands (or the belts).
4. Utthita Parvakonasana/ Extended Side Angle
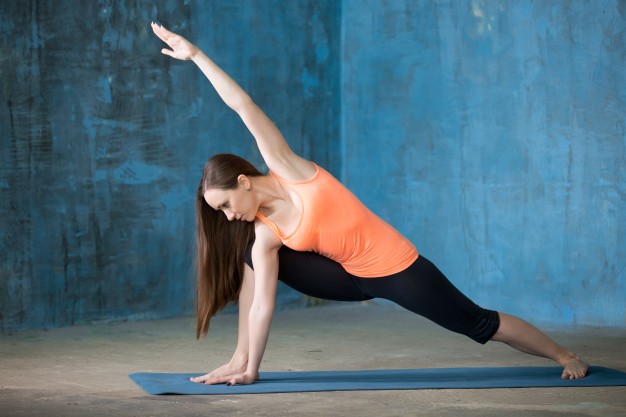
Instead of putting your hand on the floor, one modification of the extended side angle pose is to bring your forearm to your thigh. It is one of the easiest yoga poses for beginners. It’s supposed to rest lightly on the thigh, not carry a lot of weight. This adjustment helps you keep your shoulders open. Your hand can also be placed on a block.
Step-By-Step Instruction
- Kneel on the ground. Stretch your right leg out to the right and press your foot to the floor or, if you can’t reach it, use a block for extra support. Keep the left knee directly below the left hip and align the left knee with your right heel. Slightly turn the pelvis to the right, but to the left, turn your upper torso back. Point the kneecap in the direction of the ceiling.
- Bring your arms out to your sides as you inhale, parallel to the floor, palms down. Bend over the plane of your right leg to the right and place your right hand on the shin, ankle, or floor outside your right leg. Contract the torso on the right and stretch the left side. On the outer left hip, place your left hand and push the pelvis down toward the floor.
- Sweep the left arm over the back of the left ear by inhaling. The bending of the side tends to drop the torso toward the floor. Shift the upper torso away from the floor without moving the left hip back (continuing to roll it slightly forward).
- Stay in this pose from 30 seconds to a minute, anytime. Come up as you inhale, reaching to pull the torso upright through the top arm. Return the right knee to the left, and repeat with the legs inverted.
5. Chakravakasana (Cat-Cow Stretch)
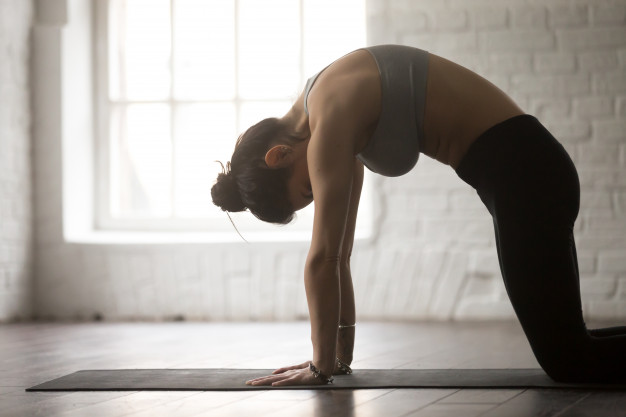
Spinal extension accompanied by spinal flexion is the best of both worlds. Moving back and forth awakens and warms the back, increases control of the body, and is a simple introduction to how to do a series of vinyasa by controlling the breath movements.
The most important pose you learn when starting yoga, particularly if you have back pain, maybe cat-cow.
Step-By-Step Instruction
- In a “tabletop” position, begin on your hands and knees. Make sure that your knees are aligned directly below your hips and that your ankles, elbows, and shoulders are perpendicular to the floor and in line. Center your head in a stance of neutrality, eyes gazing at the floor.
- Turn your spine toward the ceiling as you exhale, making sure you keep your shoulders and knees in place. Place your head on the floor, but don’t press your chin against your stomach.
- Inhale, return to the neutral “tabletop” position on your knees and hands.
- For a gentle, flowing vinyasa, this pose is also combined with Cow Pose on the inhale.
6. Balasana (Child’s Pose)
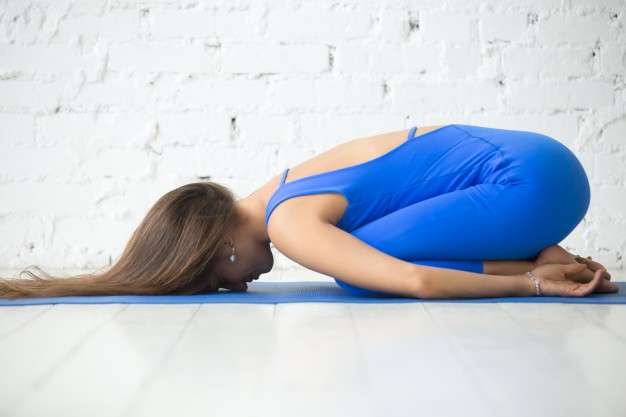
The pose of the child is very significant because it’s the posture you assume anytime during a yoga class you need a break. You do not have to wait for the instructor to call for a break if you ever feel tired. Just step into the pose of a child and, when you’re ready, rejoin the class. For the back, hips, thighs, and ankles, it offers a gentle stretch but does not challenge strength or balance.
Step-By-Step Instruction
- On the board, kneel. Touch your big toes and sit down on your feet, then spread your legs as wide as your hips.
- Exhale, and between your legs, lay your torso flat. Spread your sacrum around the back of your pelvis and narrow your hip toward the navel, so that the inner thighs are nestled down. When you raise the base of your skull away from the back of your spine, lengthen your tailbone away from the back of the pelvis.
- Place your hands next to your torso on the floor, palms up, and release the front of your shoulders towards the floor. Feel how the shoulder blades are stretched wide over your back by the weight of the front shoulders.
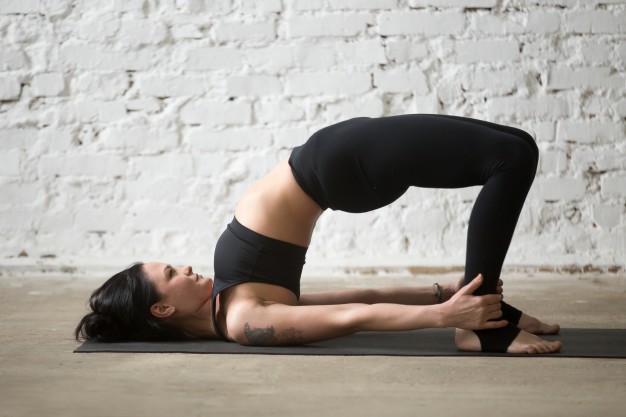
7. Bridge pose
Energetic, rejuvenating, or luxuriously restorative, Bridge Pose can be everything you like.
Step by step instruction
- Lay on the floor and put a thickly folded blanket under your shoulders to cover your neck, if necessary. Bend your knees and place your feet on the floor, with your heels as close as possible to your sitting bones.
- Exhale and drive your tailbone upward toward the pubis, firming (but not hardening) the buttocks, and raising the buttocks off the floor, actively grinding your inner feet and arms into the floor. Maintain parallel thighs and inner feet. To help you remain on the tops of your shoulders, clasp the hands under your pelvis and stretch through the sides.
- Lift the chin away from the sternum slightly and press the top of the sternum toward the chin, straightening the shoulder blades toward your back. Firm the outer arms, expand the shoulder blades, and try to lift the space between them into the torso at the base of the neck (where it rests on the blanket).
- Stay in a pose from 30 seconds to 1 minute, anywhere. Release with an exhalation, slowly rolling down the spine to the floor.
8. Virasana/ hero pose
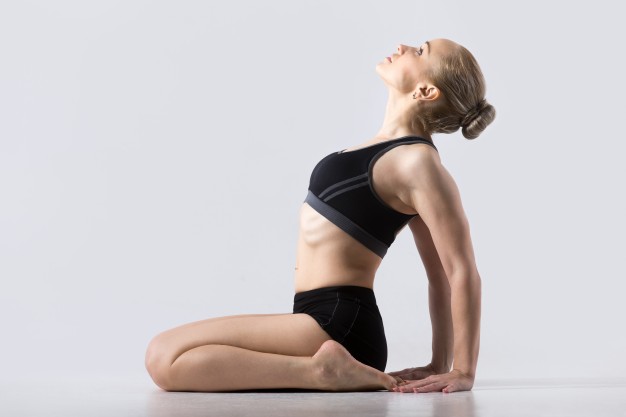
Virasana is a balm at the end of the day for sore legs, as well as a seated meditation alternative to Lotus. It is one of the famous yoga poses for beginners.
Step-By-Step Instruction
- Kneel on the floor with your legs perpendicular to the floor and touch the inner knees together (use a folded blanket or bolster to wedge between your calves and thighs if necessary). Slide your feet apart with the tops of your feet flat on the concrete, slightly narrower than your hips. Slightly angle the broad toes towards each other and press the top of each foot evenly on the concrete.
- With your torso leaning slightly forward, exhale and sit halfway back. Wedge your thumbs into the back of your knees and pull your calf muscles’ skin and flesh toward the heels. Sit there between your knees, then.
- If your buttocks do not rest on the floor comfortably, lift them on a block or thick book put between your feet. Make sure that all sitting bones are supported equally. Leave space between the inner heels and the outer hips for a thumb’s-width. Turn your thighs inward and press with the bases of your palms the heads of the thigh bones into the concrete. Then lie your palms, one on the other, in your lap.
- Keep in this pose for 30 seconds to 1 minute at first. Extend your stay steadily for up to 5 minutes. Press your palms to the floor and raise your buttocks, slightly higher than your heels, to get out.
9. High Lunge, Crescent Variation
This High Lunge variation, often referred to as Crescent Pose, is excellent preparation for the complete version of Virabhadrasana I (Warrior I Pose)
Step-By-Step Instruction
- Starting with Adho Mukha Svanasana (Downward-Facing Dog). Exhale and step forward between your hands with your right foot, aligning your knee above the heel. Keep your strong and firm left leg.
- Inhale and lift the erect torso. Sweep your arms out to the sides at the same time and lift them overhead, palms facing.
- Take care not to stress the lower back. Toward the land, lengthen your tailbone. This will take the blades of the shoulder further into the back to help protect the chest. Look up in the direction of your thumbs.
- Make sure that the front ribs are not pressed forward. Draw them through the torso and down. Raise the arms from the ribs of your lower back, reaching through your tiny fingers. Keep for a minute to 30 seconds.
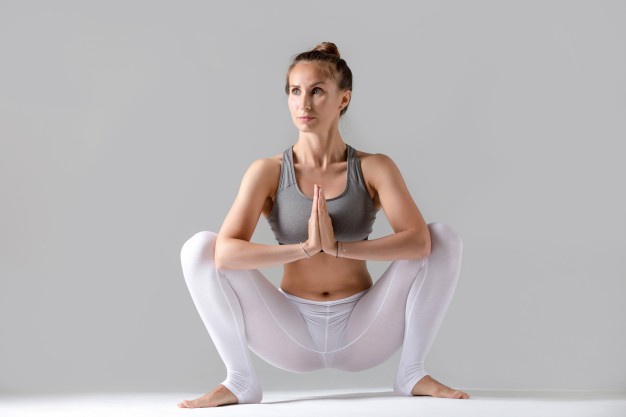
10. Malasana /Garland Pose
An outstanding facilitator of good health in the pelvic floor, Garland Pose, called Malasana in Sanskrit, stretches the knees, groins, and back while promoting proper digestion. It is one of the easiest yoga poses for beginners. Don’t worry if your heels don’t hit the floor—just rest them on a folded blanket.
Step-By-Step Instruction
- Start at Tadasana (Mountain Pose) with your big toes touching and a very limited amount of space between your heels.
- Spin your inner thighs back while softly releasing the flesh of your buttocks to your toes.
- Extend your sternum away from your navel and widen around your collarbones.
- Inhale and perform Utkatasana (Chair Pose) to energetically reach your fingertips to the ceiling.
- Exhale; separate your knees as you bend deeper and bring your palms down in front of your core.
- Lower your buttocks in the direction of your heels, allowing your pelvis to gently spill backward and guide your tailbone to the floor.
- Simultaneously stretch your sternum forward and upwards and widen around your collarbones, just as in Tadasana.
- Tilt your torso forward and nest the sides of your body between your inner thighs, softly pinning your knees to embrace your outer shoulders. In Anjali Mudra (Salutation Seal), press your palms together to highlight the openness of your chest and the raise of your heart.
- Keep for 10–12 breaths, then put your palms in front of your legs and press Uttanasana (Standing Forward Bend).
11. High Lunge
Counteract the symptoms of the Modern-Day Sitting Syndrome by stretching your hip flexors in the High Lunge.
Step-By-Step Instruction
- From Uttanasana (Standing Forward Bend), bend your knees and, with an inhalation, move your left foot back towards the back edge of your mat, with your football on the floor. Step back far enough to allow your right knee to form a right angle.
- Place your torso on your forehead thigh and lengthen it forward. To soften your right, imagine that your thigh is falling to the floor under your torso’s weight. Look forward to that. At the same time, hold the left leg and lift it to the ceiling, keeping the left knee straight. Stretch your left heel to the concrete.
- Exhale and move the right foot back to the left. Echo the above instructions, but turn left and right. Or go to Adho Mukha Svanasana (Downward-Facing Dog), inhale, and move your right foot forward between your hands.
12. Parsvottanasana
Consciously work to ground your hands and feet with Deep Side Stretch Pose, called Parsvottanasana in Sanskrit. Parsvottanasana promotes harmony, knowledge of the body and encourages trust.
Step-By-Step Instruction
- Place your hands on your hips and note that your hipbones are square to the front of the mat.
- To replicate the square pelvis of Tadasana, root down with your right big toe mound while pinning your right outer hip back and into your left foot.
- Turn your left inner thigh back and roll your left outer hip forward.
- Externally rotate your shoulders by pushing back the heads of your upper arms and rotating your biceps towards your triceps.
- Inhale; lengthen the spine and engage the quadriceps.
- Exhale; go to your hips, and begin to fold forward and down.
- Keep the heads of your upper arms rolling back and up from the floor as you descend your torso.
- Repeat
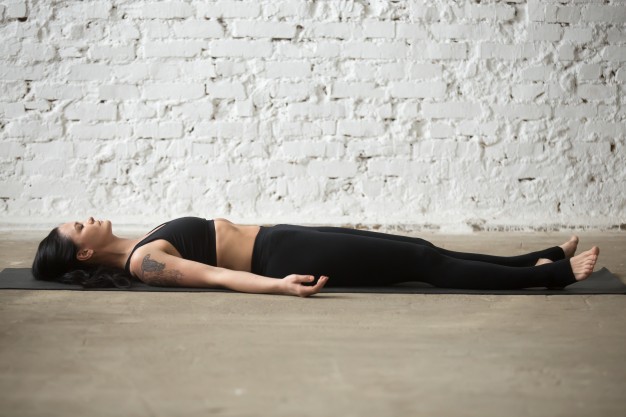
13. Savasana
Savasana is a posture of complete relaxation, making it one of the most difficult.
Step-By-Step Instruction
- In Savasana, it is important that the body be put in a neutral position. Lie down on the floor with your knees bent, feet on the floor, and lean back on your forearms. Lift the pelvis slightly off the floor and, with your hands, force the back of the pelvis towards the tailbone, then drop the pelvis to the floor. Inhale and slowly stretch the leg to the right, then to the left, moving through the heels.
- In your fingertips, raise the base of the skull away from the back of the neck and release the back of the neck towards the tail bone. If you have some trouble doing this, put the back of your head and neck on a folded towel.
- Get your arms to the ceiling, perpendicular to the floor. Rock slightly from side to side and widen the back ribs and shoulder blades away from the spine. Then release the arms to the floor, angled uniformly relative to the centerline of the torso. Turn your arms outward and spread them out from the gap between your shoulder blades.
- Gently soften the root of the tongue, the wings of the nose, the channels of the inner ears, and the skin of the forehead, particularly around the bridge of the nose between the eyebrows. Let your eyes drop to the back of your head, then turn them down to look at your bottom.
14. Ujjayi
Ujjayi is a beginner-friendly springboard than all other formal pranayamas.
Step-By-Step Instruction
- Inhale through your nose, then slowly exhale through your wide-open mouth. Slowly steer the out-going breath across the back of your throat with a HA tone. Repeat a few times, then shut your mouth.
- Start by practicing 5 to 8 minutes, gradually increase your time to 10 to 15 minutes. After a minute or two of regular breathing is done, lie down in Shavasana (Corpse Pose) for a few minutes.
These were some beginner-friendly easy yoga poses that you can opt for. We hope that these poses get you started on your fitness journey.
Disclaimer: Content from Vedicsources.com is not intended to diagnose, treat, cure or prevent any disease.Expert advice is for educational use and general information only and should not be substituted for the medical advice of your own doctor or any health care professional.
Recommended Read:
New Hand-painted Art Collection – Shop to Support